Super Search Documentation
Getting Started
How to install Super Search on WordPress
Super Search can be found on the WordPress plugin directory
Link to wordpress guide on this: https://wordpress.org/documentation/article/manage-plugins/#installing-plugins-1
How to add a plugin to your WordPress site:
- Log in to Your WordPress Dashboard: Enter your WordPress website’s URL followed by “/wp-admin” in your web browser’s address bar. Log in with your username and password.
- Navigate to the Plugins Section: In the WordPress dashboard, find the “Plugins” option in the left-hand menu. Click on it.
- Click on “Add New”: Once in the Plugins section, click on the “Add New” button at the top of the page. This will take you to the Add Plugins page.
- Search for “Super Search”: In the search bar on the Add Plugins page, type “Super Search” and press Enter. The Super Search plugin should appear in the search results.
- Install the Super Search Plugin: Find the Super Search plugin in the search results and click the “Install Now” button next to it. WordPress will now download and install the plugin for you.
- Activate the Plugin: After the installation is complete, the “Install Now” button will change to an “Activate” button. Click on the “Activate” button to activate the Super Search plugin on your WordPress site.
Set up your super search account
If you don’t already have one set up your super search account: https://supersearch.hi-orbit.com/register
Add your website to super search using your domain name
In your account on the Super Search dashboard select ‘Sites’ from the side menu. Next click on the ‘Create site’ button in the top right.

Enter your domain name. Make sure to include the full url including either http:// ot https:// (the transfer protocol).
Underneath this is site type which is automatically set to WordPress.
Click on ‘Create’ to save your site

Get your public and private password
On the Super Search dashboard, select ‘sites’ in the sidebar
Now you can see your site domain(s), and the public and private API keys.

Log in to your WordPress dashboard, navigate to ‘Settings’ and then ‘Super Search’ in the side menu.
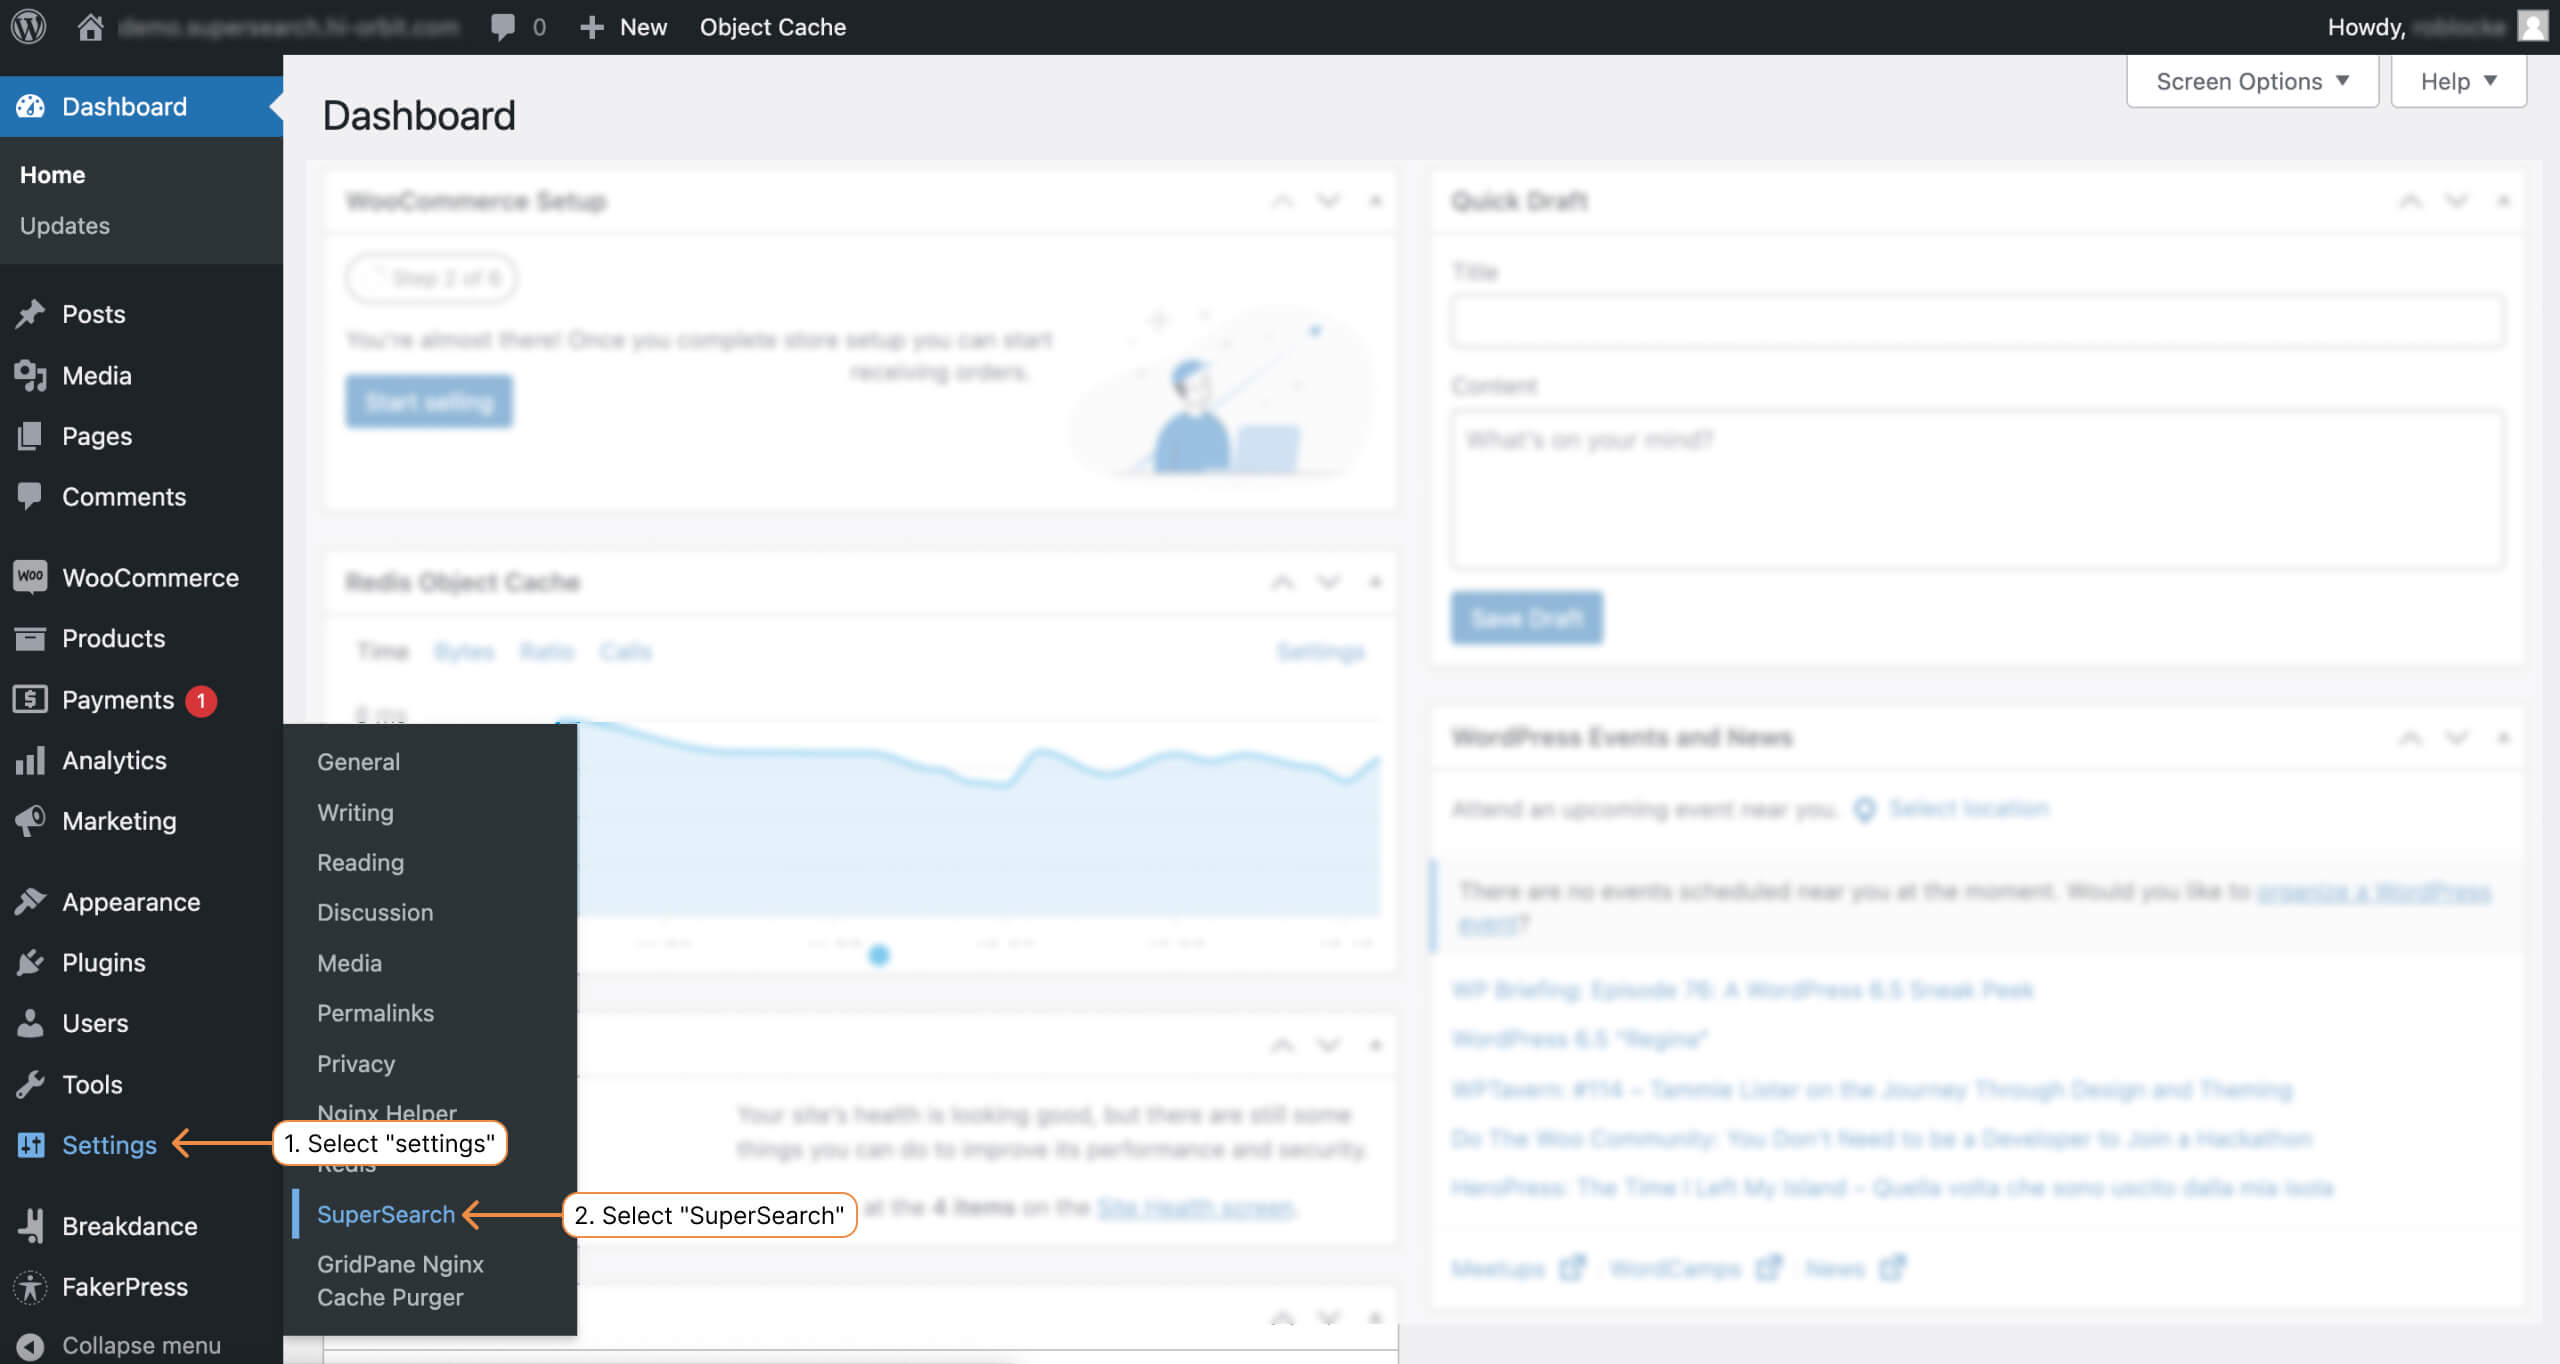
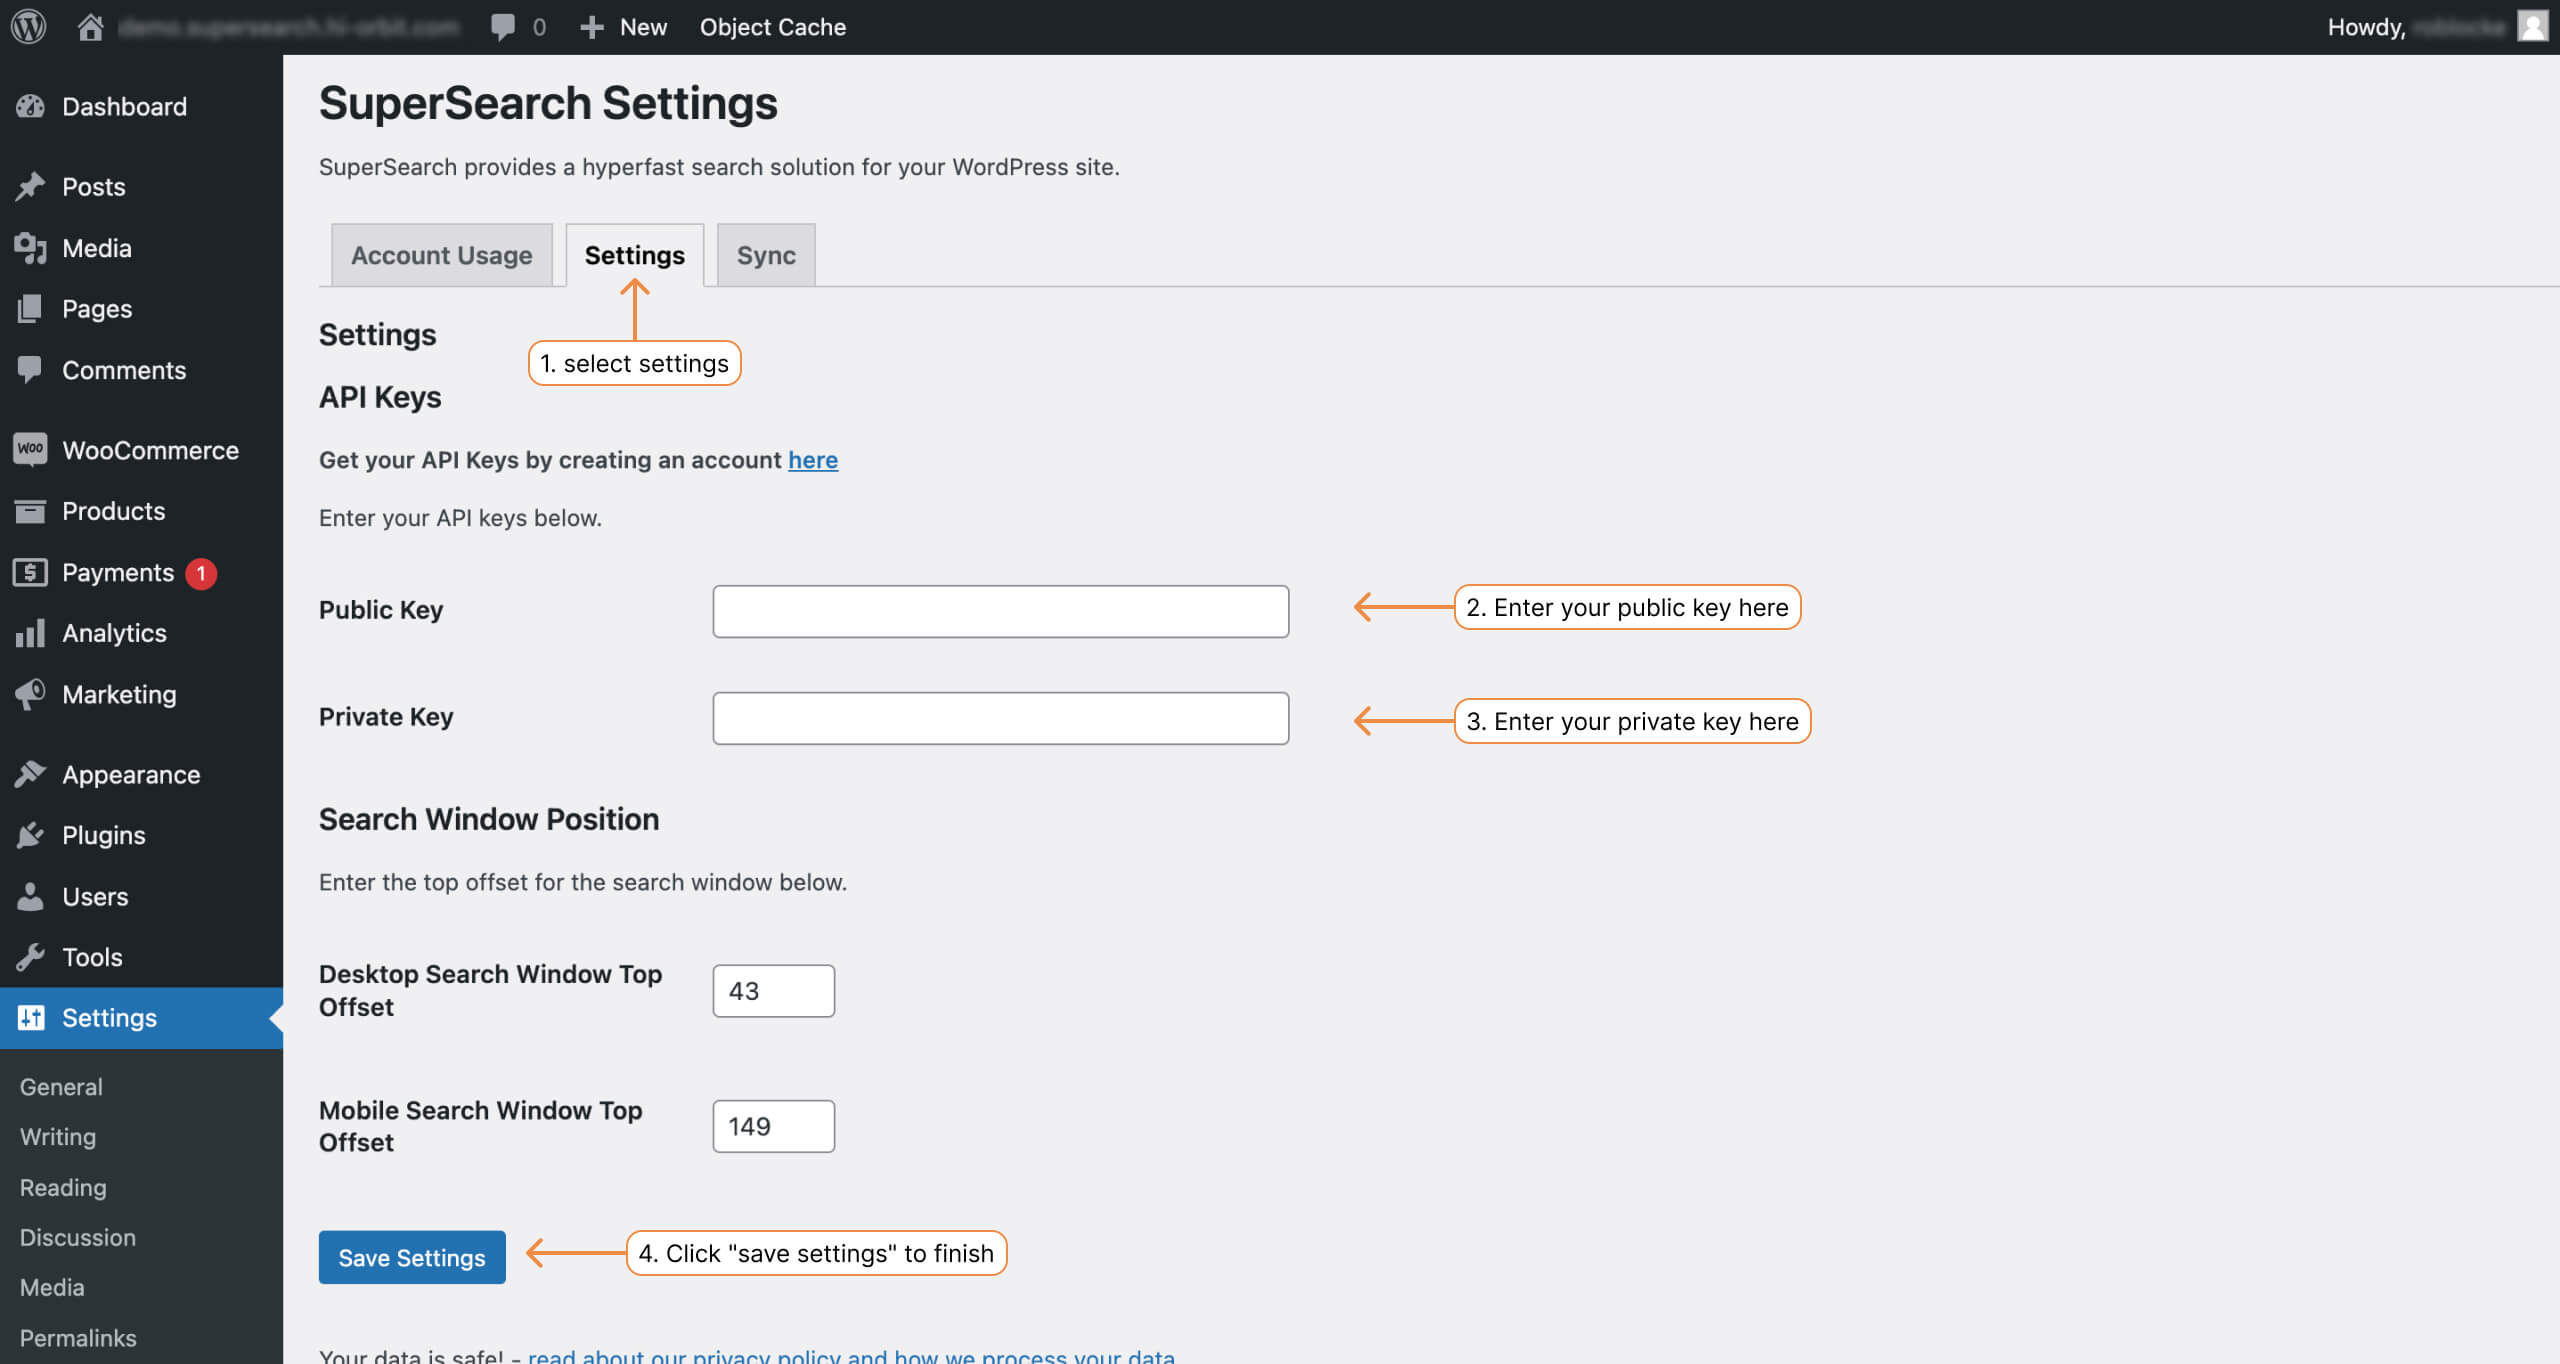
Now click on Settings. Here you will be able to see where to add your public and privte keys for the API.
Click ‘Save’
Sync your products, posts and pages
To set up your posts, pages and products so that they show in the search you need to sync them to our database.
Log in to your WordPress dashboard and navigate to ‘Settings’ and then ‘Super Search’ in the side menu.
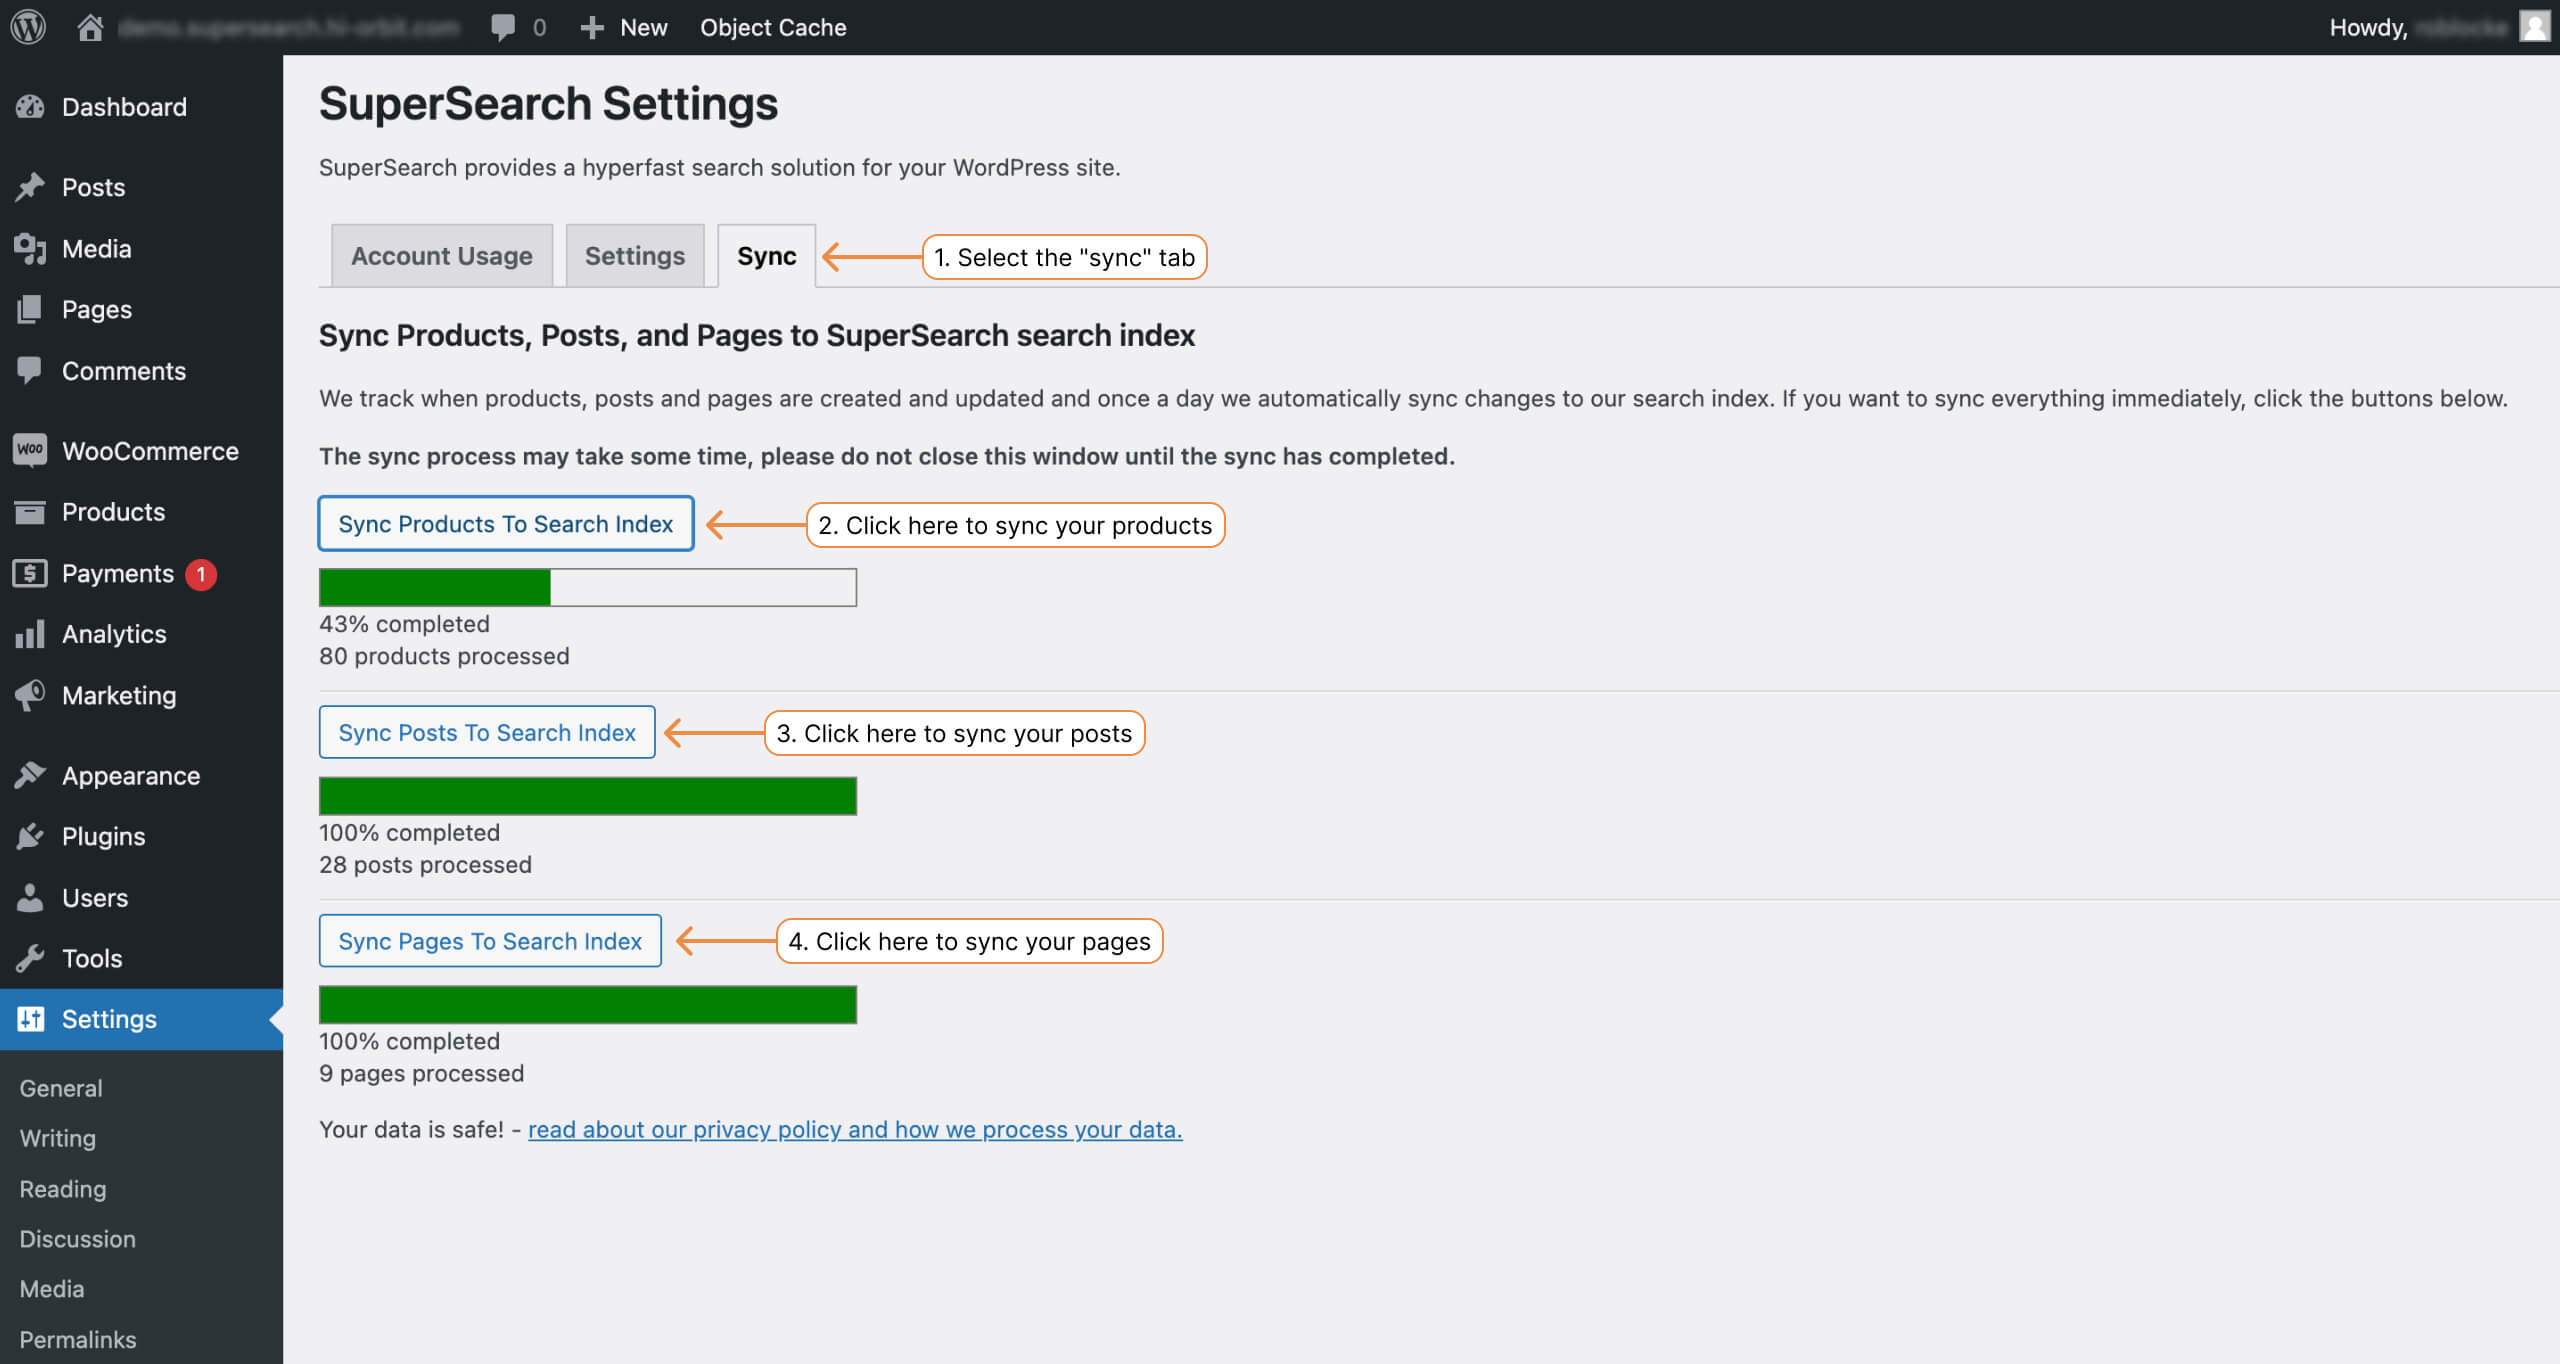
Select sync in the top tabs on the Super Search dashboard and click each of the buttons shown below.
IMPORTANT: Make sure you do not navigate away from or close the web browser while syncing is taking place.
Once all the sync progress bars have reached 100% your search is ready!
It may take a few minutes once the sync has been completed for the database to index the products and the changes to show on the frontend
You only need to manually run the sync for setup. After this Super Search keeps track of any IDs that have changed and they will be updated on the search database once a day. You can manually re-sync at any time to push changes sooner.
Add Super Search to your site using shortcode
To add Super Search to your website use the shortcode supersearch
Make sure to remove the default search if you do not want users to use it.

Search settings
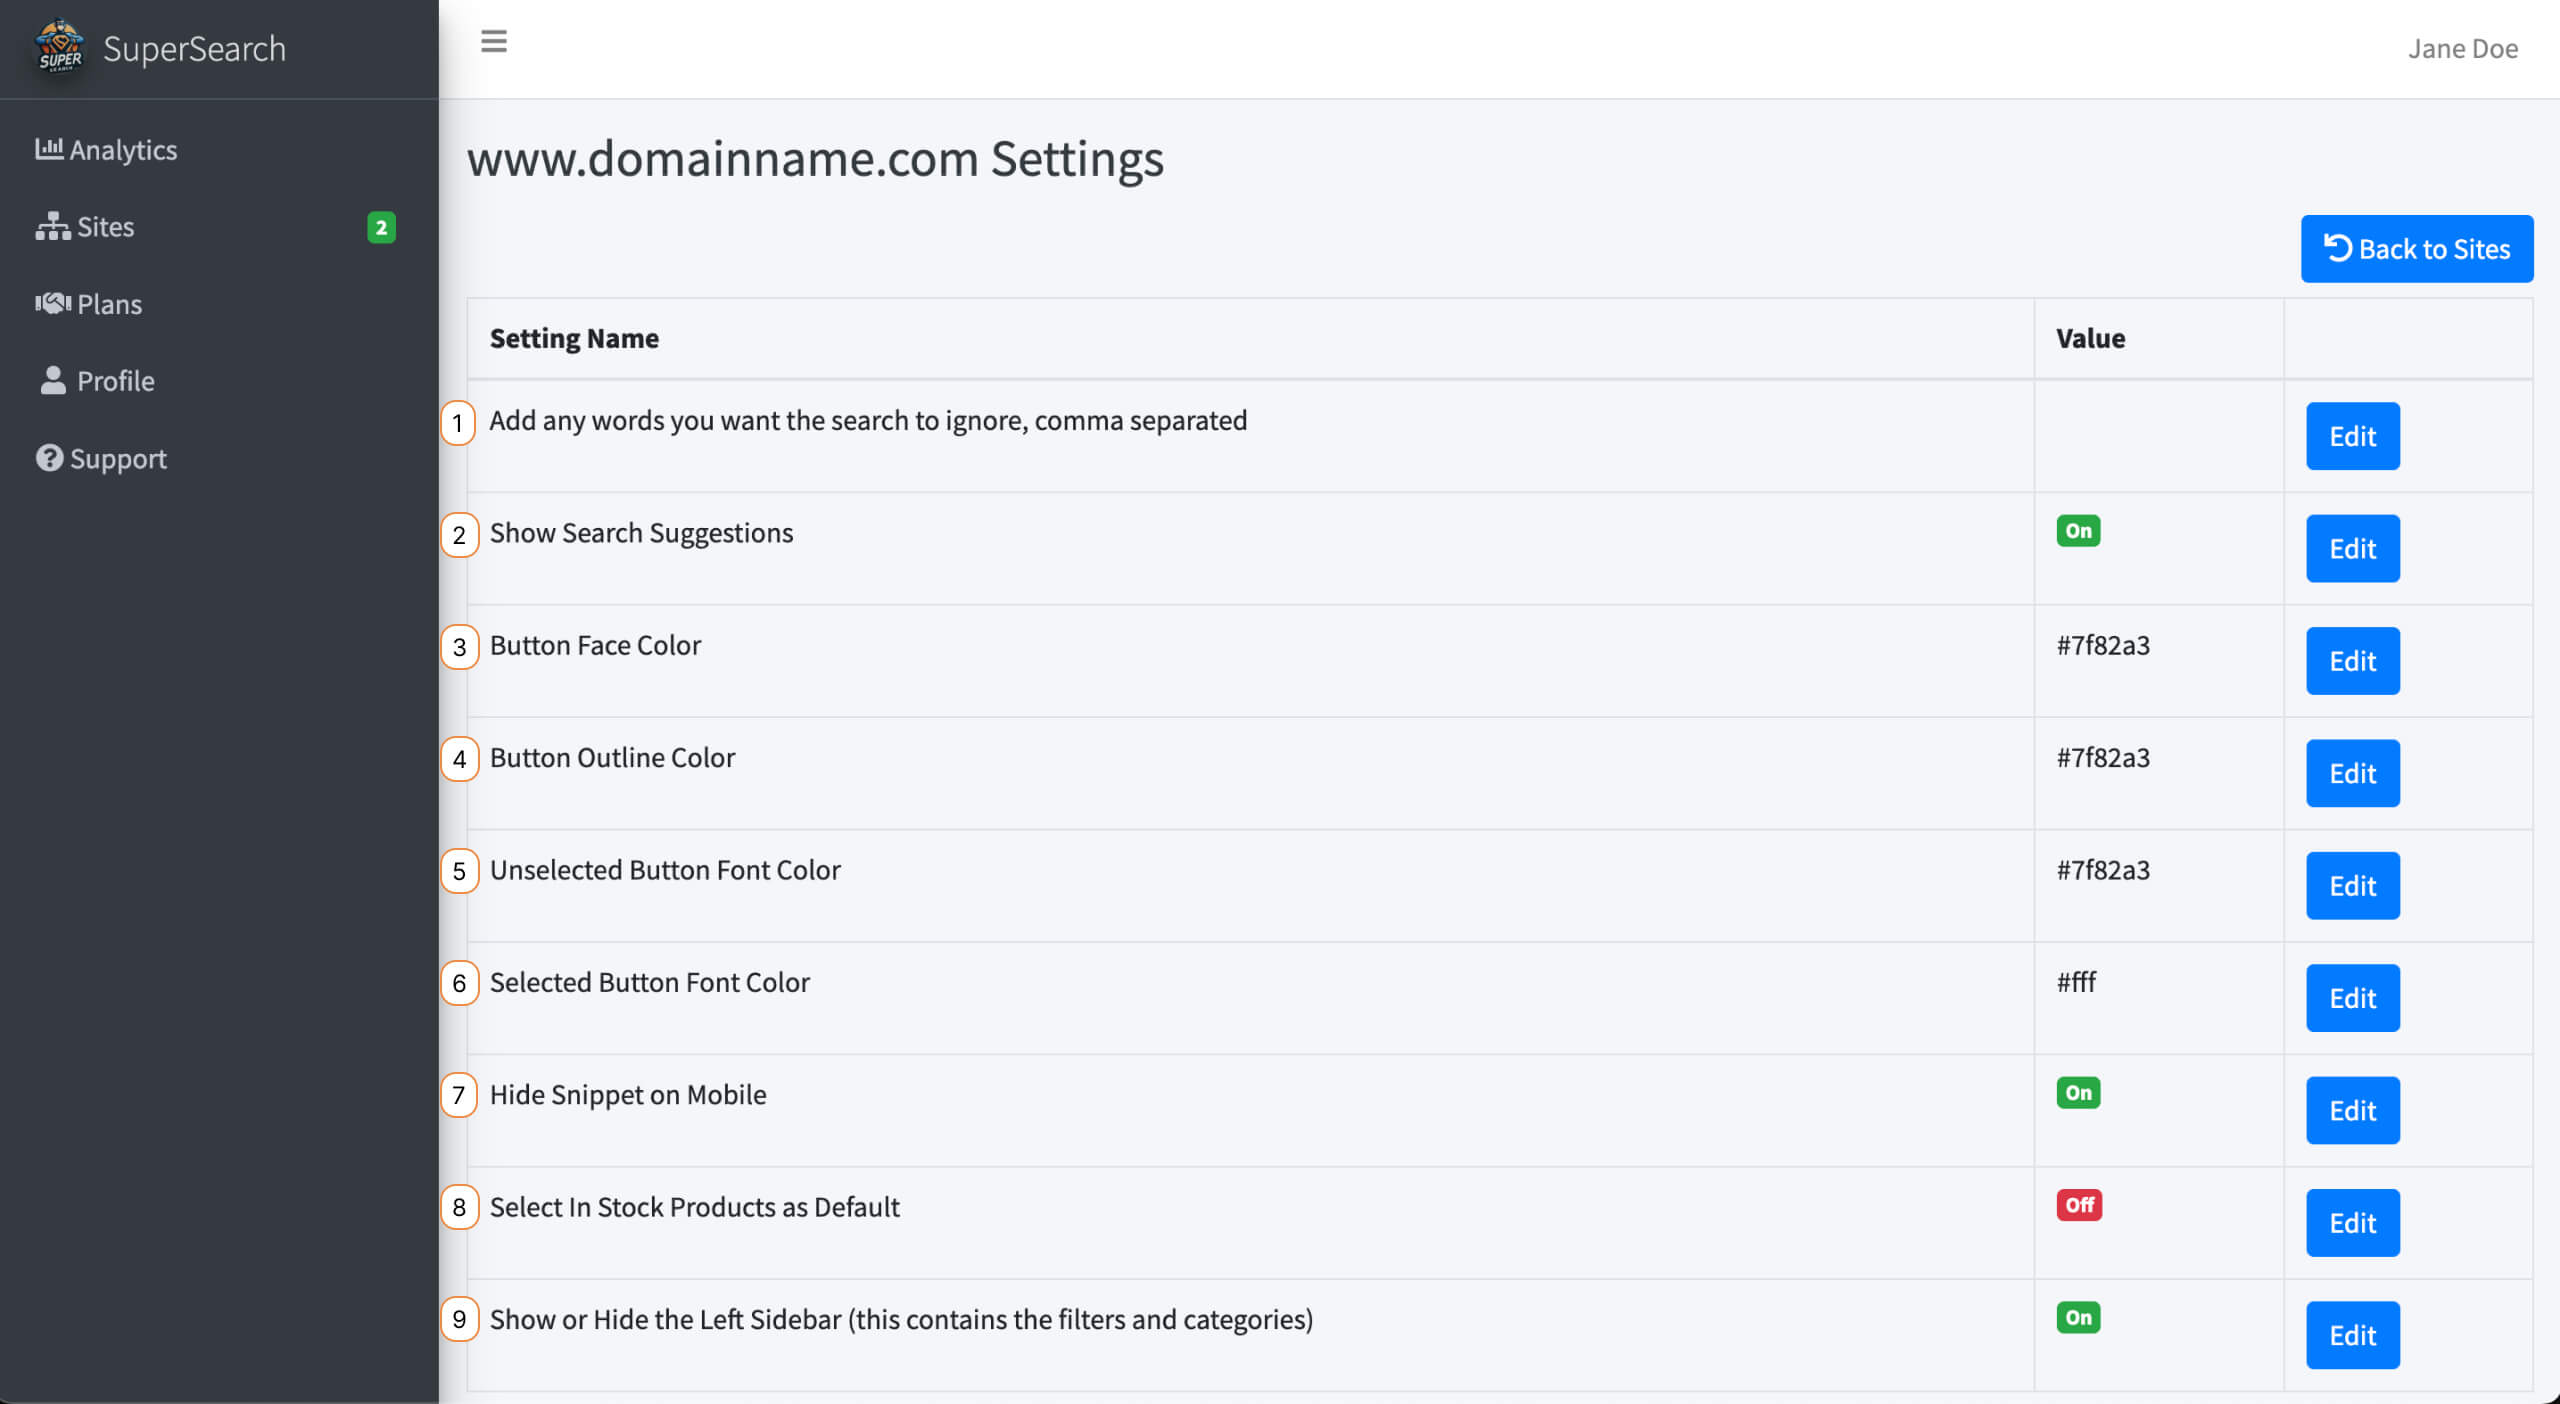
1: Add any words you want the search to ignore, comma-separated
For example enter “green, shorts” and these two terms will not show any results when entered into the search bar
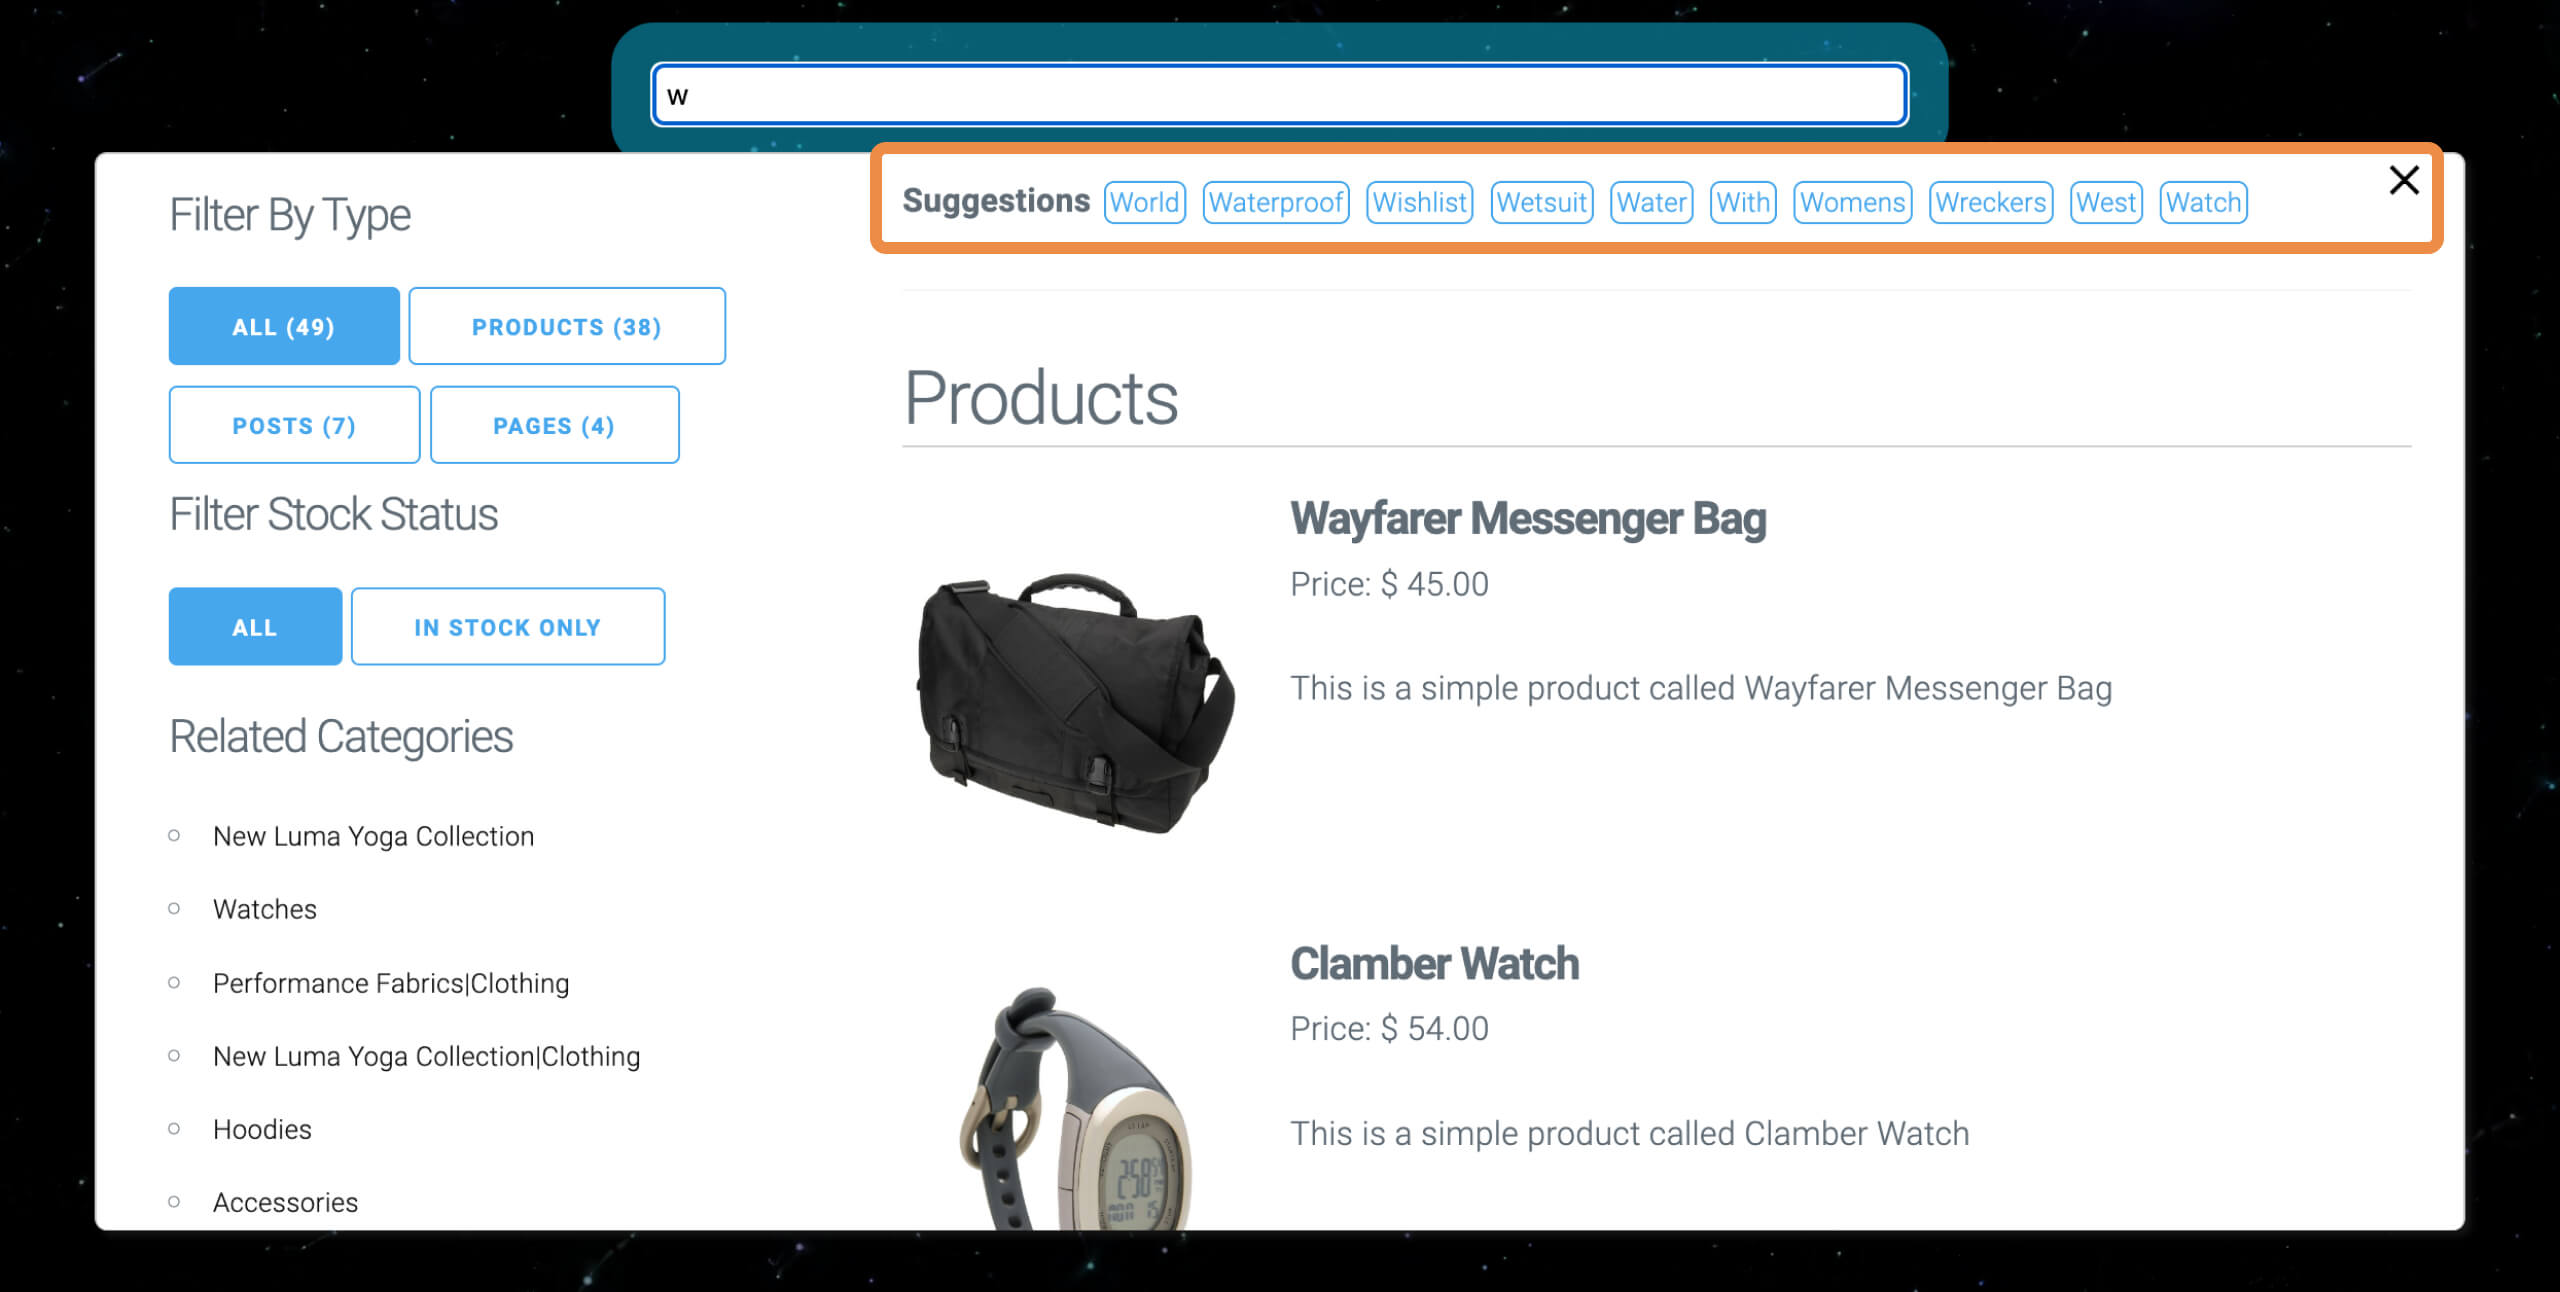
2: Show Search Suggestions
See AI generated search suggestions as you type based on your product catalogue
3-6: Button Color

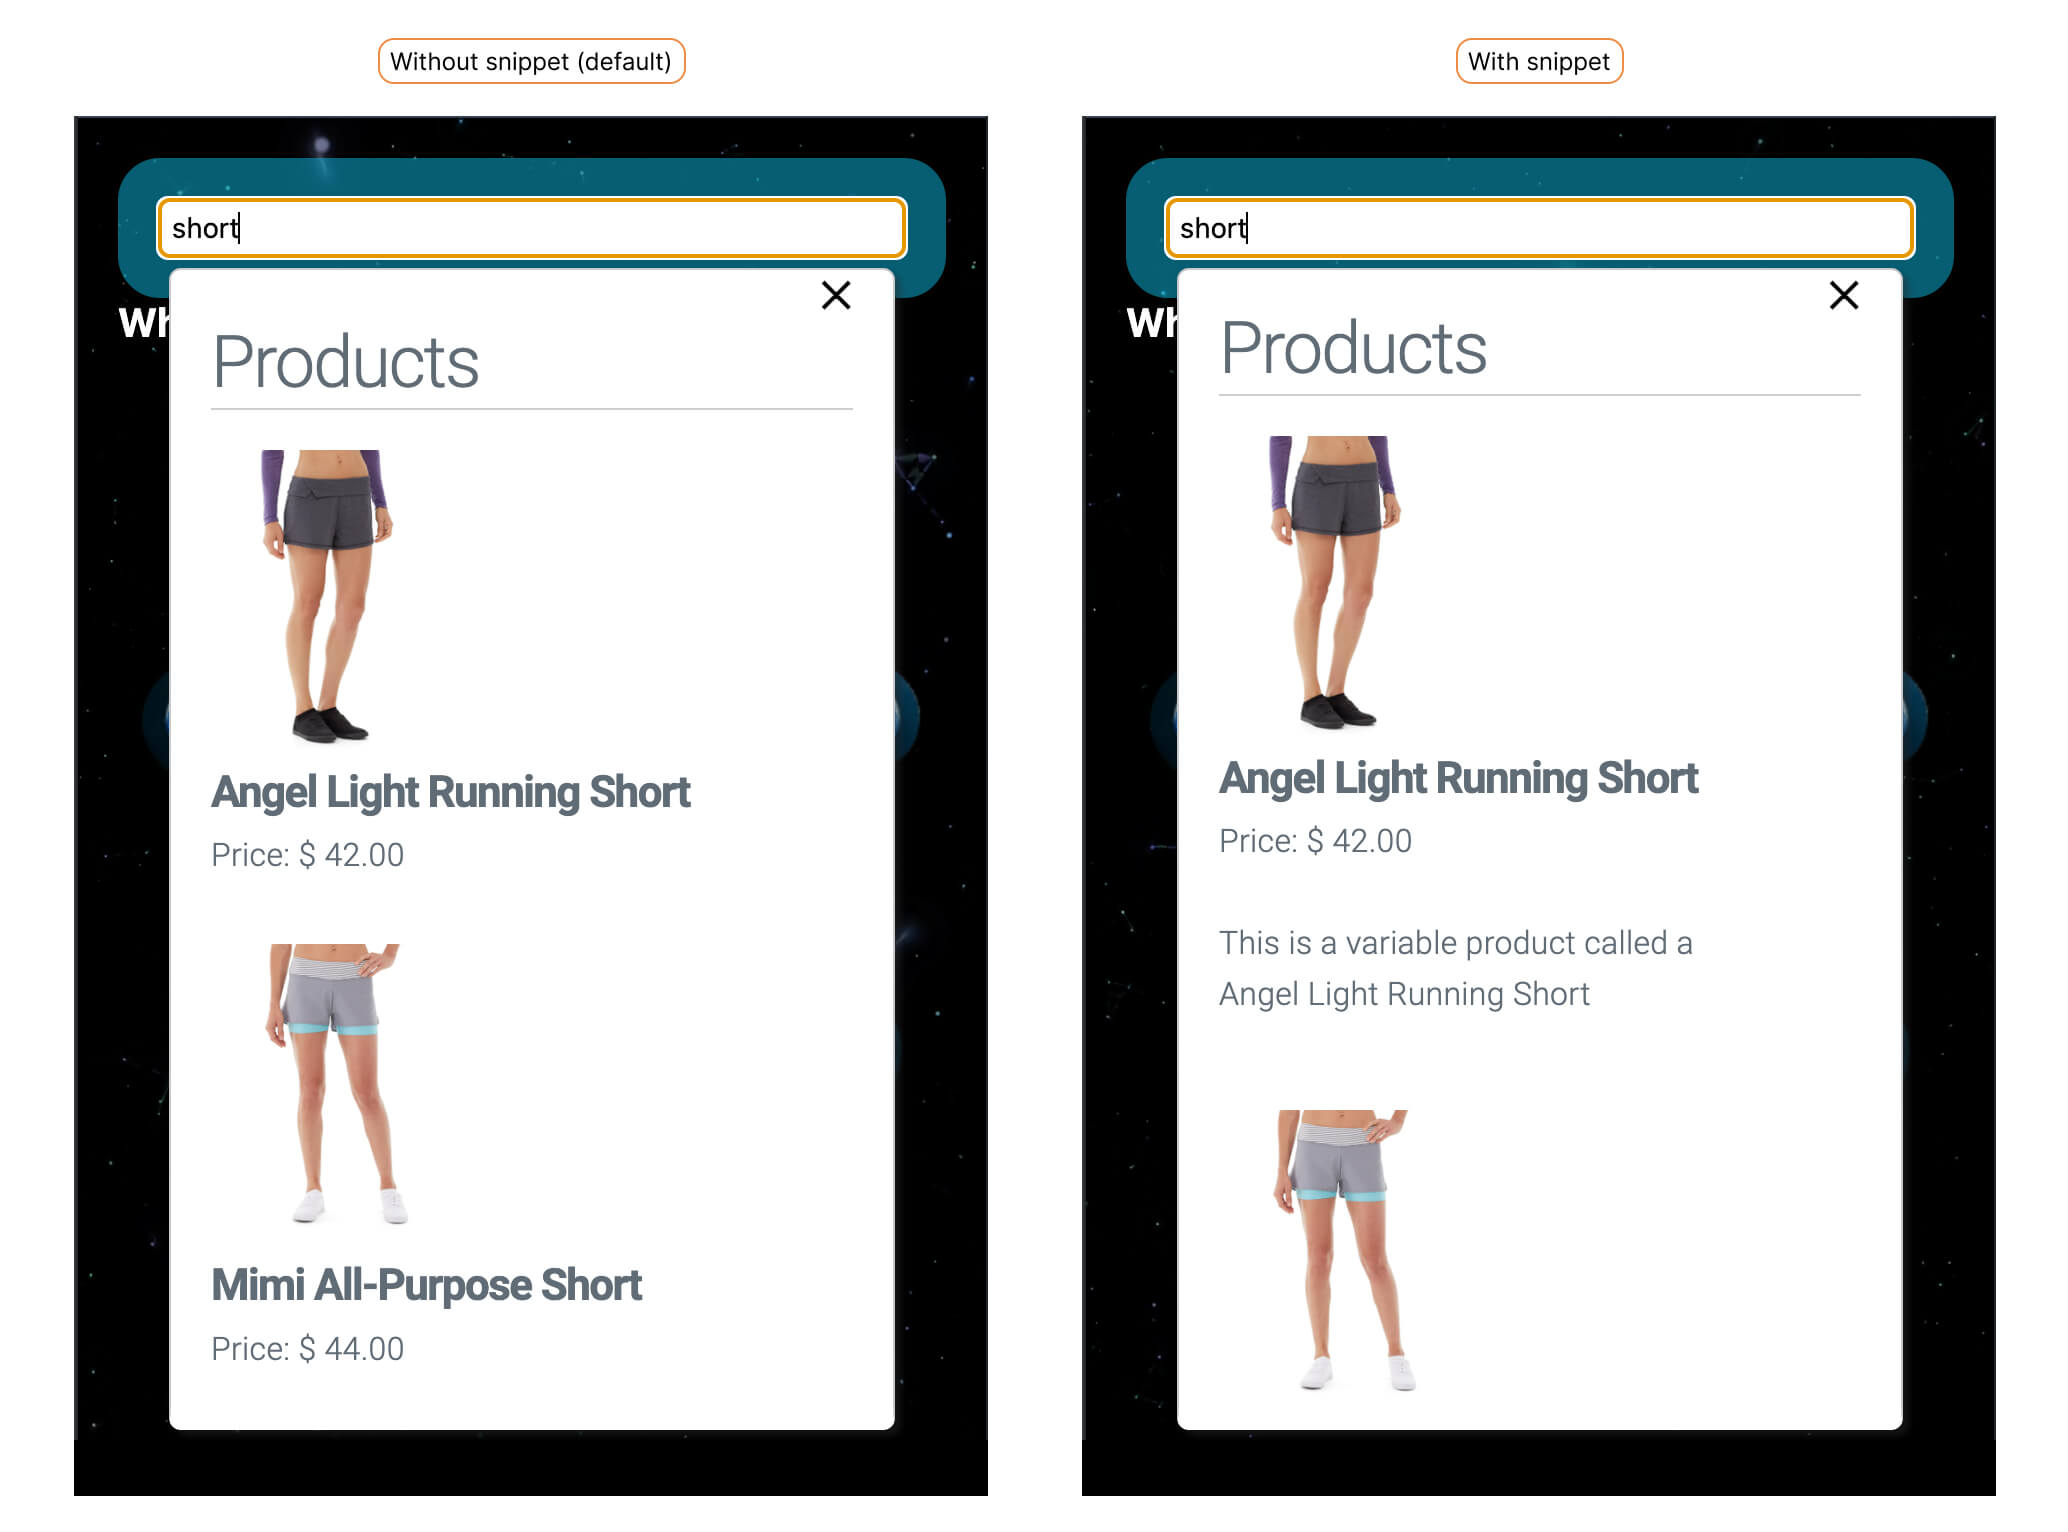
7: Hide Snippet on Mobile
Show or hide the snippet on small screens (also called the ‘short description’ on products or ‘excerpt’ on posts)
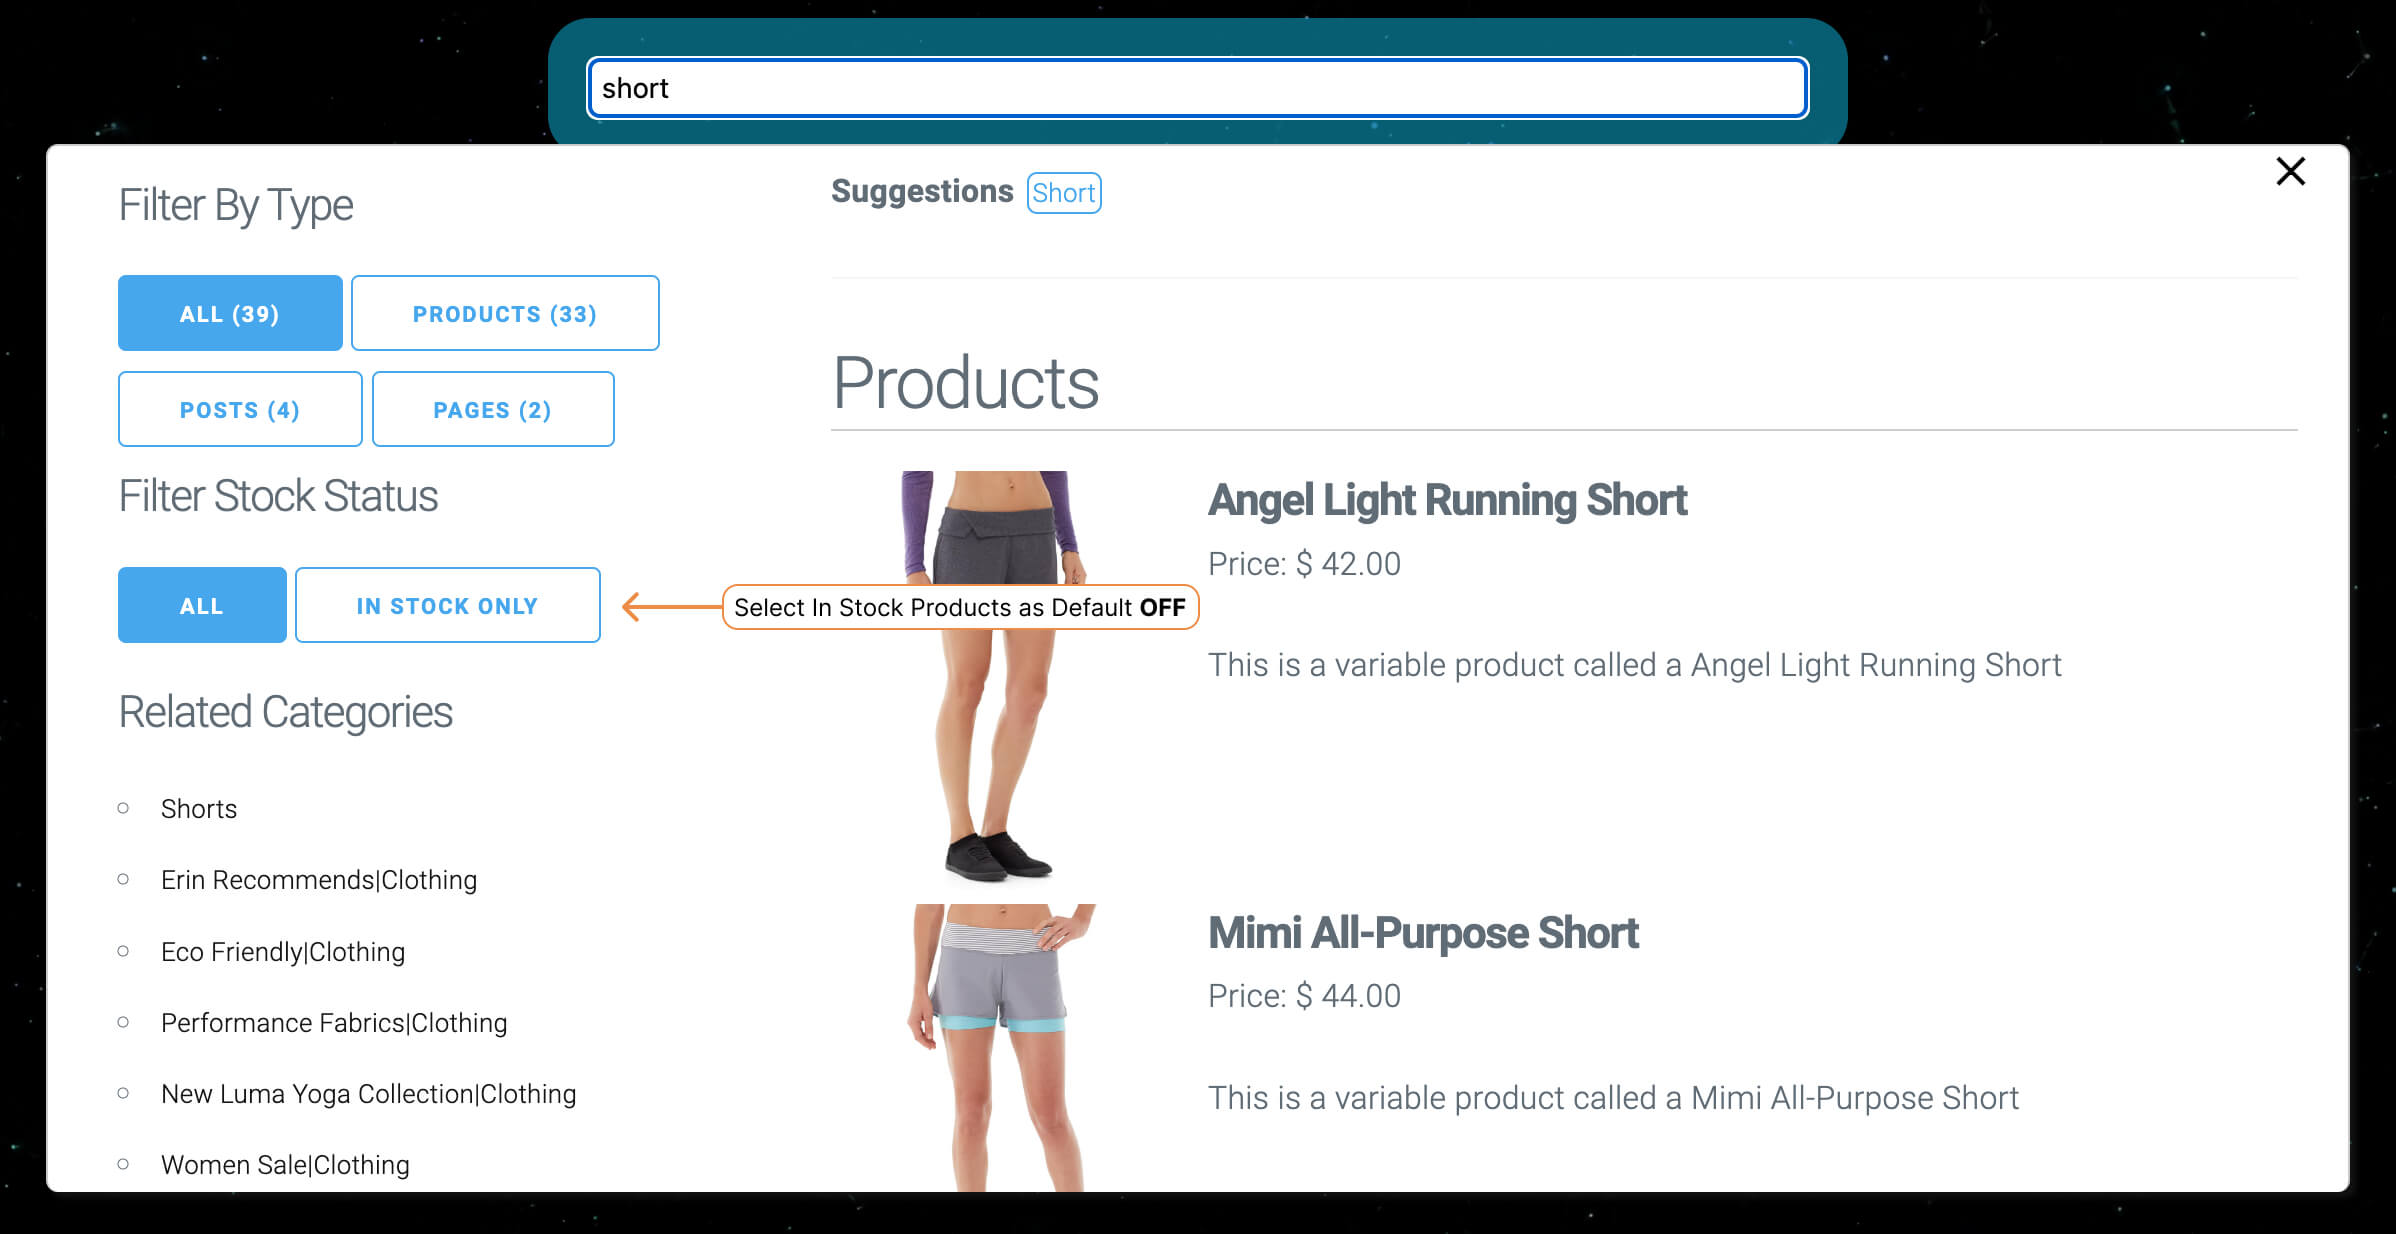
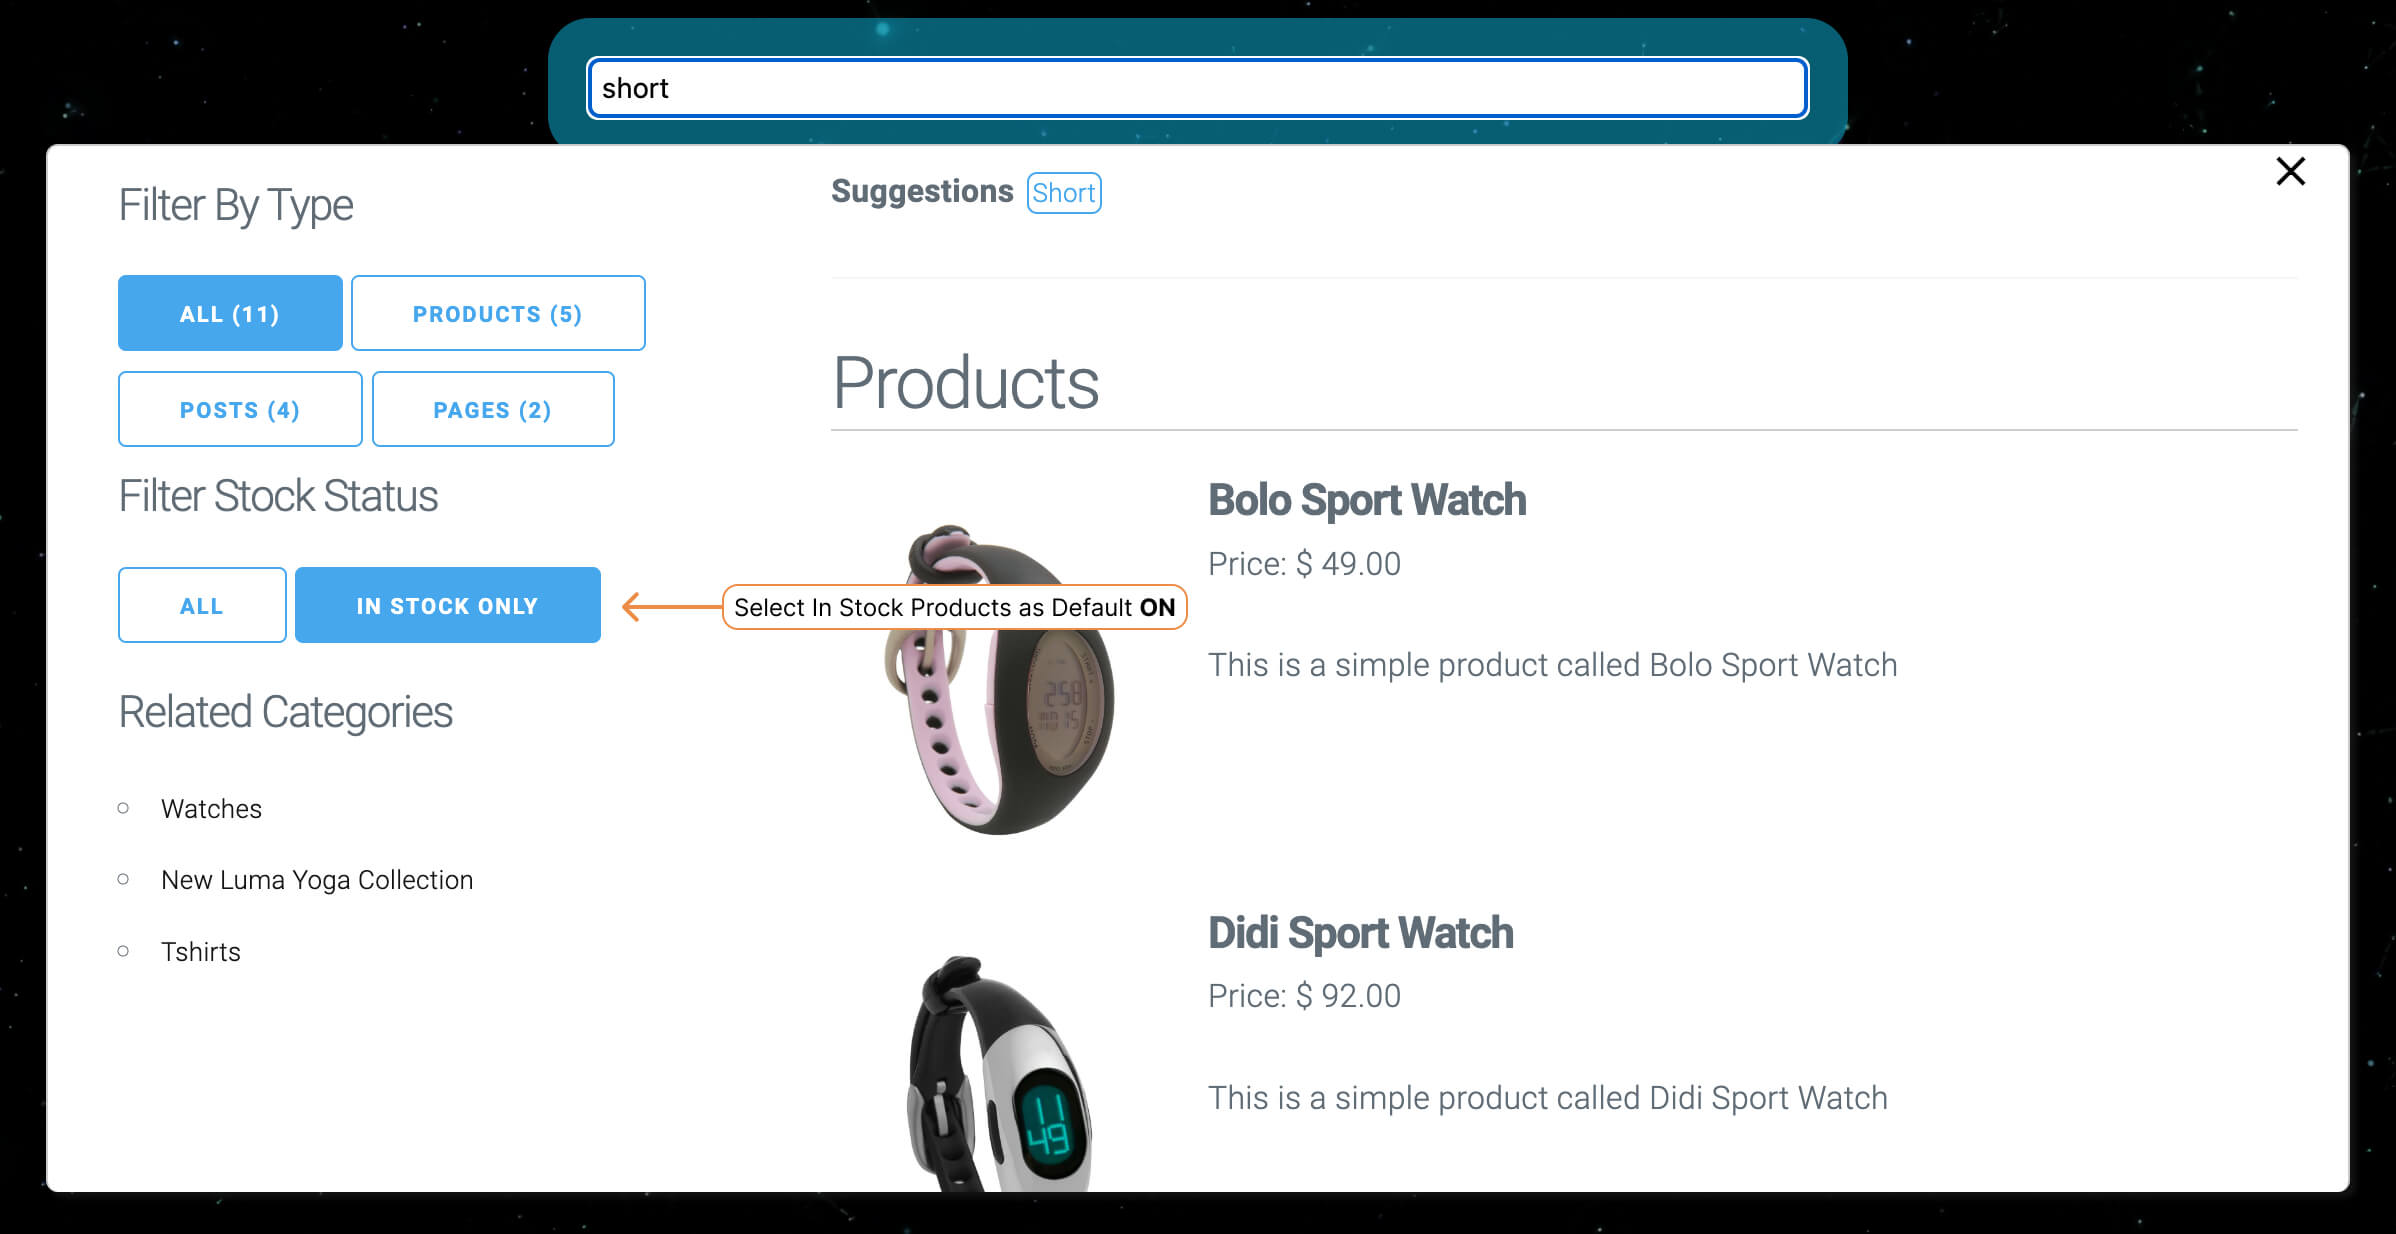
8: Select In Stock Products as Default
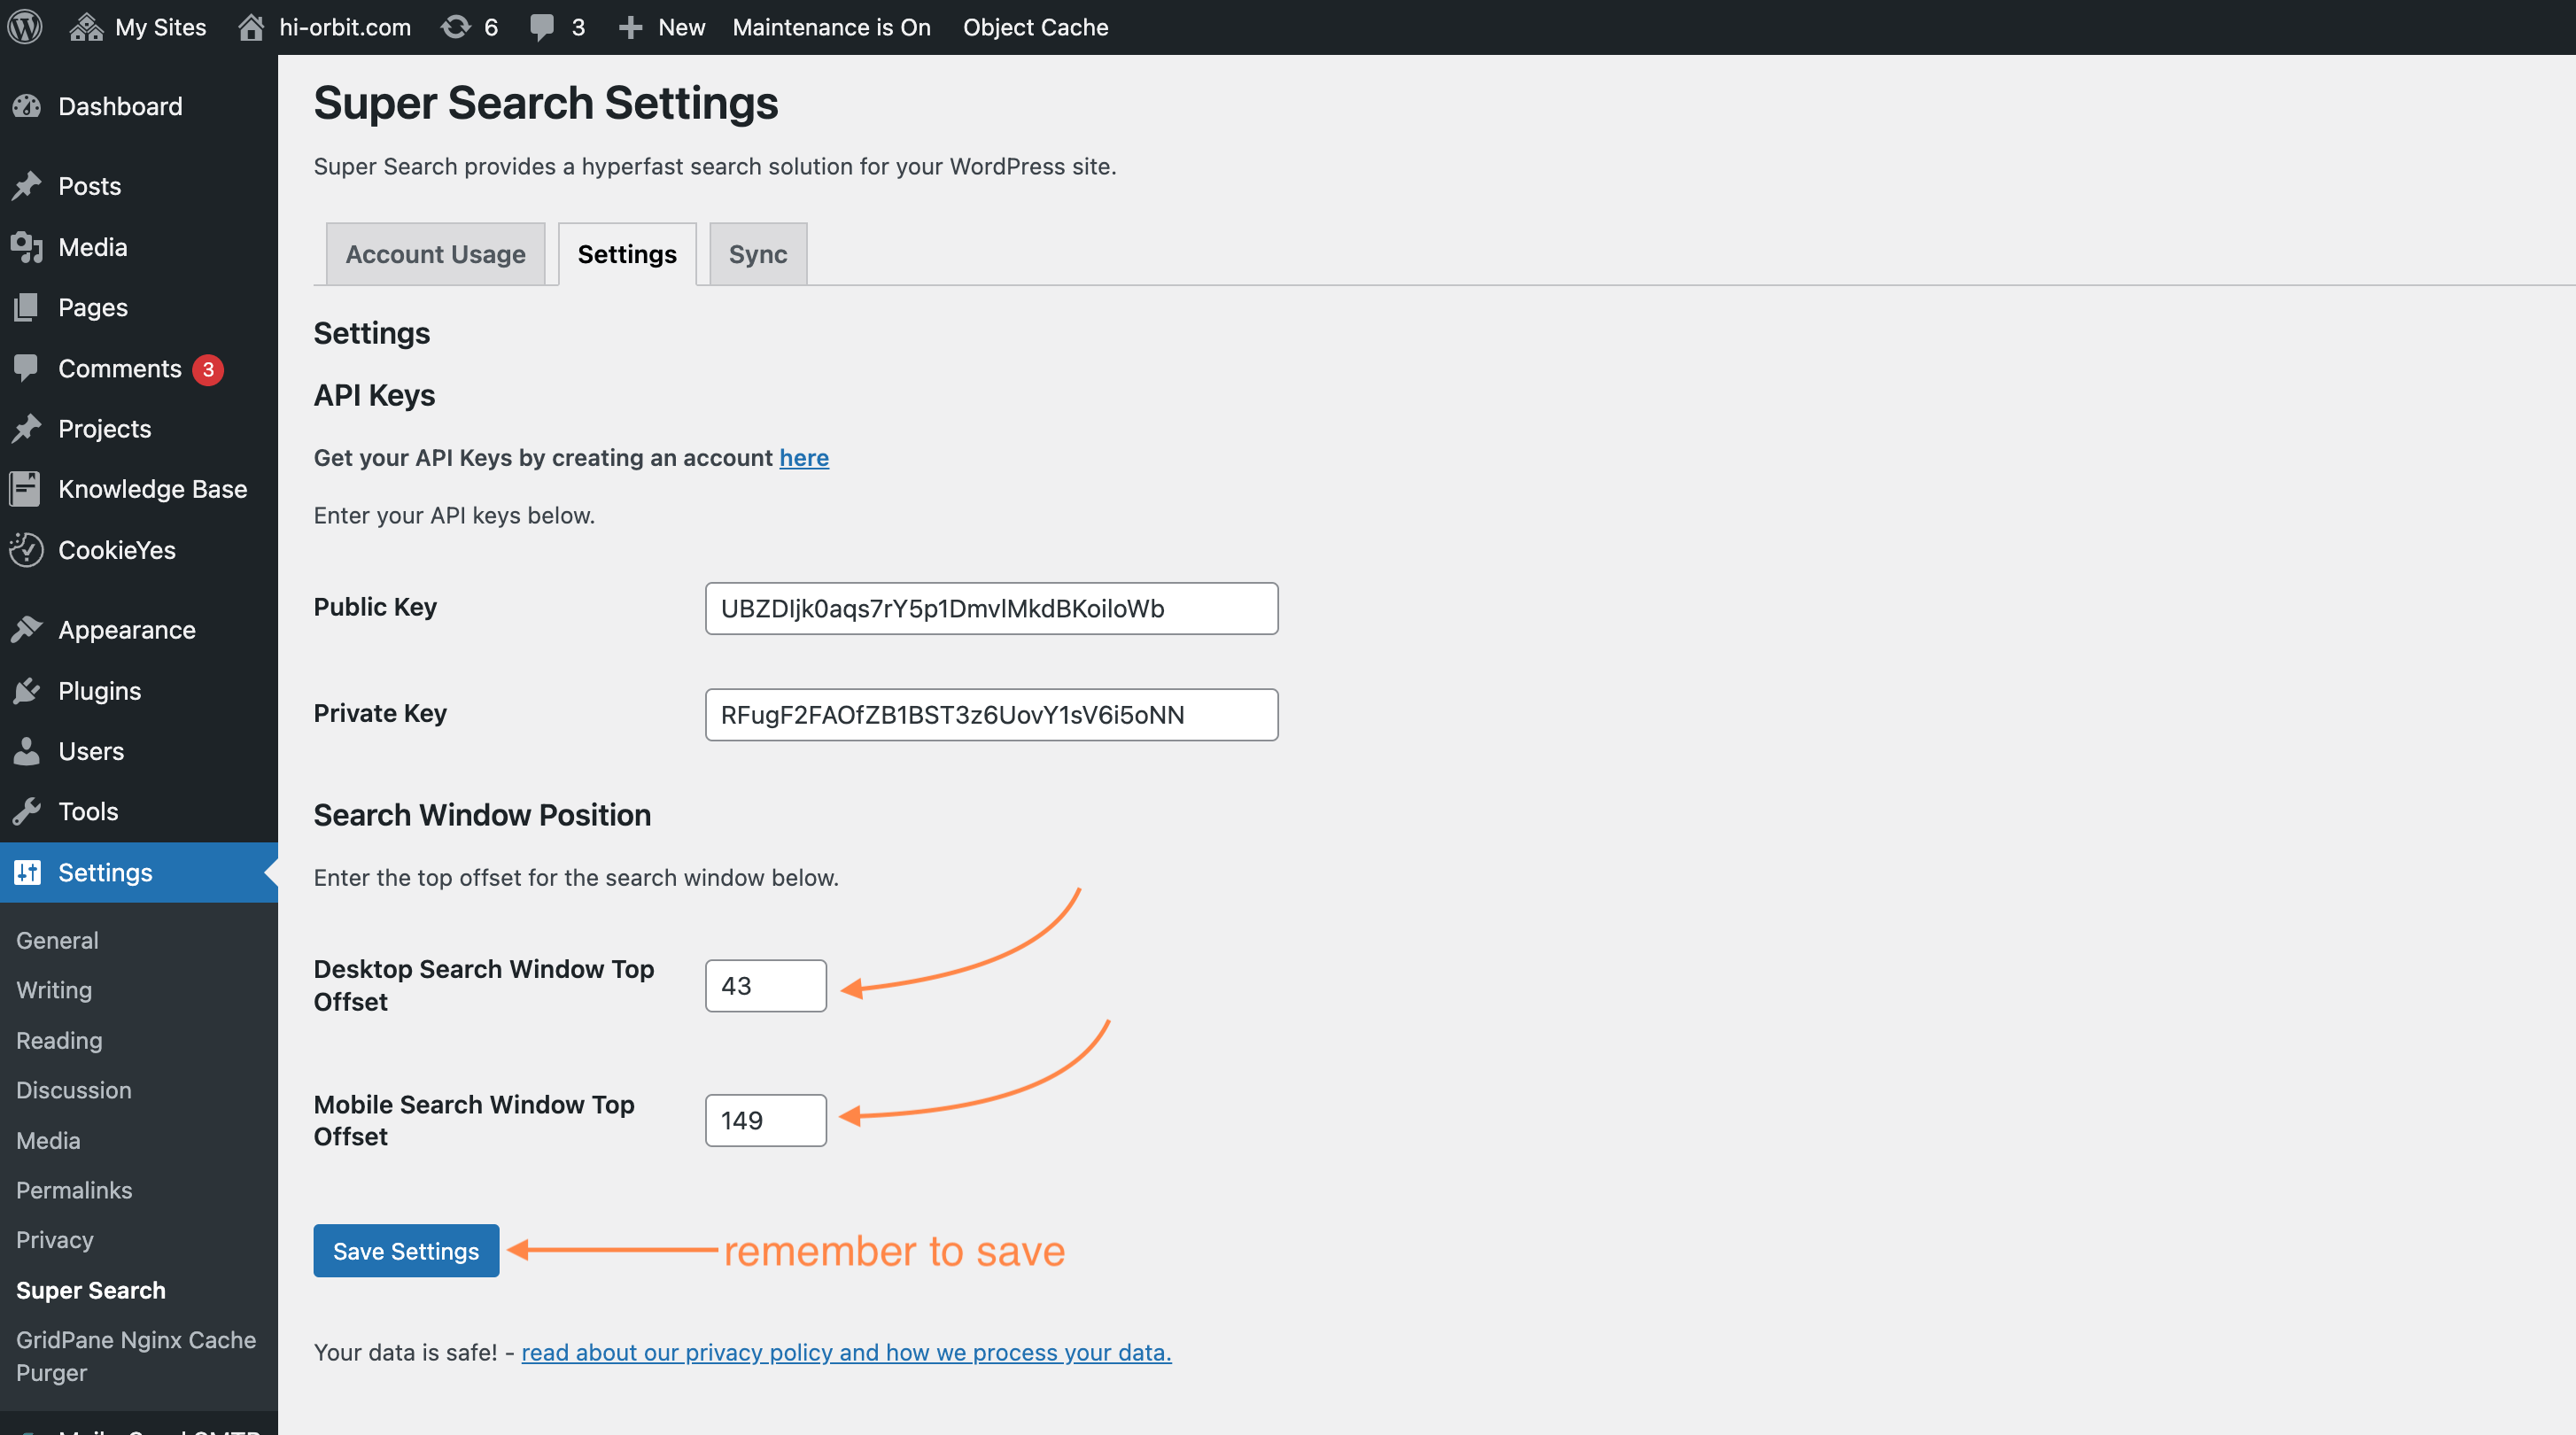
Adjust the offset of your search bar
If your search bar is showing too high up on the page or too low down you can set an offset by navigating to ‘Settings’ in the Super Search dashboard. The offset is measured in pixels.
